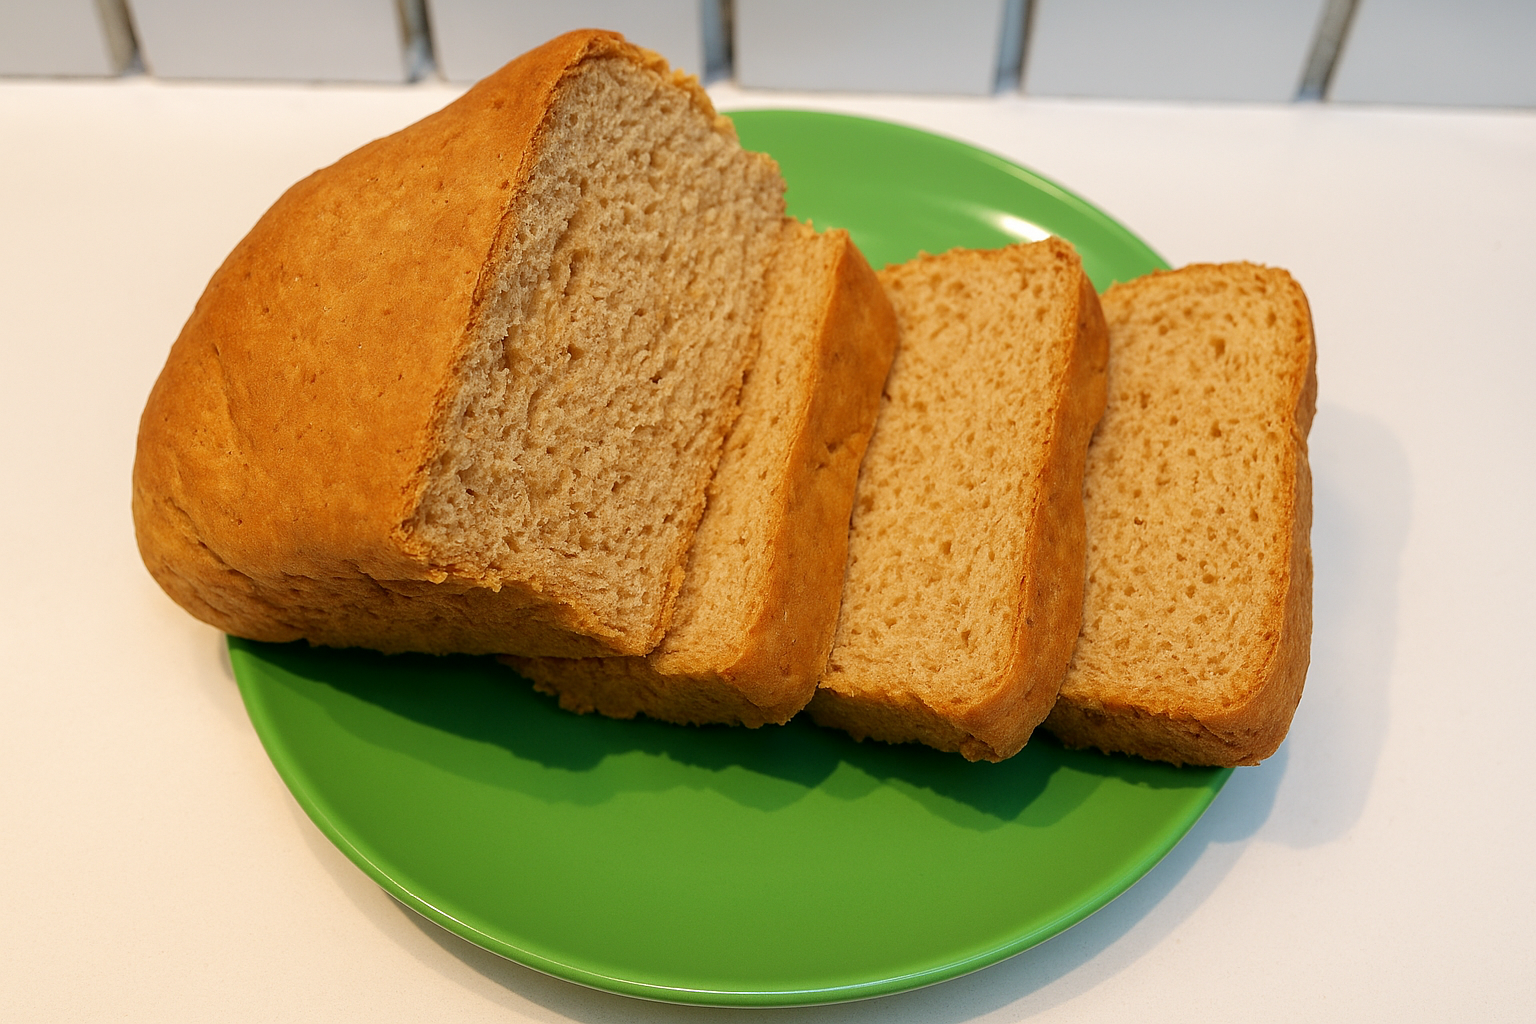
There’s something special about the smell of freshly baked bread filling the house — it feels like comfort and home in one. I’ve always loved baking, but I enjoy it even more when I can make something fresh for my family. Store-bought bread is convenient, but nothing beats the satisfaction of pulling a warm, soft loaf out of the oven — knowing every ingredient that went into it.
If you’ve ever wanted to bake soft, fluffy homemade bread but still include a little wholesome goodness, this soft homemade bread recipe with a whole wheat twist is exactly what you need.
It’s tender.
It’s slightly nutty.
It’s perfect for breakfast, sandwiches, or simply tearing apart while it’s still warm.
And the best part? It’s easier than you think.
This post may contain affiliate links, I earn from qualifying purchases at no extra cost to you.
Why This Bread Recipe Works
Many whole wheat breads turn out dense or heavy. That’s because whole wheat flour contains bran, which can interrupt gluten development.
This recipe balances:
All-purpose flour (for softness)
Whole wheat flour (for nutrition and flavor)
Butter and egg (for tenderness)
Milk (for richness)
Just the right amount of sugar (for subtle sweetness)
The result?
A loaf that is soft, fluffy, slightly hearty but never dry.
Ingredients
2 cups all-purpose flour
1 cup whole wheat flour
2¼ teaspoons instant yeast (1 packet)
3 tablespoons sugar
½ teaspoon salt
3 tablespoons butter (softened)
1 egg
½-1 cup warm milk (or water)
Simple pantry staples. No complicated ingredients.
Step 1: Activate the Yeast
If using instant yeast, you can mix it directly with dry ingredients.
If using active dry yeast: Warm your milk (not hot — just lukewarm). Add a little sugar.
Sprinkle yeast over it. Let it sit for 5–10 minutes until frothy.
That frothy top? That’s life. That’s your bread rising beautifully later.
Step 2: Mix the Dough
In a large bowl, combine: All-purpose flour, whole wheat flour, sugar, salt.
Add: Yeast mixture (or instant yeast), egg, softened butter and warm milk.
Mix until it forms a rough dough. It may look slightly sticky — that’s okay.
Step 3: Knead with Patience
Turn the dough onto a lightly floured surface. Knead for about 8–10 minutes.
Push. Fold. Turn. Repeat. At first, it may feel rough. Keep going.
Gradually, it becomes smooth, elastic, and soft.
Kneading builds gluten — and gluten builds structure.
Step 4: First Rise (The Resting Moment)
Place dough into a lightly greased bowl. Cover with a kitchen towel or plastic wrap.
Let it rise in a warm place for 1–1½ hours. It should double in size.
This is where the magic happens. The yeast feeds on sugar and releases carbon dioxide, creating air pockets that make your bread soft and airy.
Step 5: Shape the Dough
Once risen, gently punch it down. Don’t aggressively deflate it — just release excess air.
Shape into a loaf:
Flatten slightly, then roll tightly and pinch seams closed.
Place into a greased loaf pan.
Step 6: Second Rise
Cover again. Let it rise for another 30–45 minutes. It should puff up nicely above the rim of your pan.
This second rise is crucial for soft texture.
Step 7: Bake to Golden Perfection
Preheat oven to 350°F (175°C). Bake for 25–30 minutes. The top should be:
Golden brown
Slightly firm
Sound hollow when tapped
Step 8: The Final Touch
As soon as it comes out of the oven, brush the top with butter. This keeps the crust soft and adds beautiful shine. Let it cool for at least 20 minutes before slicing.(Though we both know you’ll be tempted.)
The Texture You Should Expect
When done correctly, this bread is:
Soft but structured
Light but slightly hearty
Fluffy inside
Gently sweet
Perfectly sliceable
It’s not dense like typical whole wheat bread. It’s balanced.
Why Add Whole Wheat Flour?
Whole wheat flour:
- Adds fiber
- Gives a subtle nutty flavor
- Makes the bread more filling
- Improves nutritional value
But using only whole wheat often results in heavy bread.
That’s why we blend it with all-purpose flour — the perfect compromise.
Common Mistakes to Avoid
1. Overheating the Milk
Hot liquid kills yeast. It should feel warm, not hot.
2. Not Kneading Enough
Under-kneaded dough leads to dense bread.
3. Rushing the Rise
Bread needs time. Don’t hurry it.
4. Adding Too Much Flour
Sticky dough is better than dry dough.
How to Store Homemade Bread
Once completely cool:
Store in airtight bread bag. Keep at room temperature for 2–3 days
Ways to Enjoy This Bread
This soft loaf is incredibly versatile. Enjoy it:
- With butter and tea
- As breakfast toast
- For egg sandwiches
- With peanut butter
- With jam
- Alongside soups
- As French toast
It’s an everyday bread.

Soft Homemade Bread Recipe with a Whole Wheat Twist
Course: Breakfast1
Loaf15
minutes25
minutes1
hour30
minutes2
hours30
minutesIngredients
2 cups all-purpose flour
1 cup whole wheat flour
2¼ teaspoons instant yeast (1 packet)
3 tablespoons sugar
½ teaspoon salt
3 tablespoons butter (softened)
1 egg
½-1 cup warm milk (or water)
Directions
- Activate the yeast: If using instant yeast, you can mix it directly with dry ingredients. If using active dry yeast: add the yeast to warm your milk. Add a little sugar. Let it sit for 5–10 minutes until frothy.
- In a large bowl, combine: All-purpose flour, whole wheat flour, sugar, salt.
- Add: Yeast mixture (or instant yeast), egg, softened butter and warm milk. Mix until it forms a rough dough. It may look slightly sticky — that’s okay
- Turn the dough onto a lightly floured surface. Knead for about 8–10 minutes
- Place dough into a lightly greased bowl. Cover with a kitchen towel or plastic wrap. Let it rise in a warm place for 1–1½ hours. It should double in size.
- Once risen, gently punch it down. Don’t aggressively deflate it — just release excess air.
- Shape into a loaf: Flatten slightly, then roll tightly and pinch seams closed.
- Place into a greased loaf pan.
- Cover again. Let it rise for another 30–45 minutes. It should puff up nicely above the rim of your pan.
- Preheat oven to 350°F (175°C). Bake for 25–30 minutes.
- As soon as it comes out of the oven, brush the top with butter. This keeps the crust soft and adds beautiful shine. Let it cool for at least 20 minutes before slicing.
Baking Tools You’ll Need
You don’t need a professional bakery setup to make soft homemade bread. Just a few basic kitchen tools will make the process easier and more enjoyable.
1. Large Mixing Bowl: A roomy bowl gives your dough space to rise comfortably without spilling over.
2. Measuring Cups and Spoons: Bread baking is precise. Accurate measurements make the difference between a fluffy loaf and a dense one.
3. Loaf Pan: This gives your bread structure and that classic sandwich shape. If your pan is smaller, your loaf may rise too high and spill over.
4. Silicone Spatula or Wooden Spoon: Perfect for mixing before kneading.
5. Pastry Brush: Brushing melted butter over the top after baking keeps the crust soft and shiny.
6. Stand Mixer with Dough Hook (Optional): If kneading by hand feels tiring, a stand mixer can knead the dough in 6–8 minutes.
Tip: Good tools don’t make the bread — your technique does. But the right tools make baking smoother, cleaner, and more enjoyable.
Frequently Asked Questions
Why is my bread dense?
It may not have risen long enough or wasn’t kneaded properly.
Why did my bread collapse?
It may have over-risen before baking.
Can I use only whole wheat flour?
Yes, but texture will be denser.
Can I use a stand mixer?
Absolutely. Knead with dough hook for 6–8 minutes.
Can You Make It Dairy-Free?
Yes. Substitute:
Plant-based milk
Dairy-free butter
Texture will remain soft.

Leave a Reply